Troubleshooting Low Water Pressure in Your Home: Effective Solutions and Tips
Dealing with low water pressure in your home can be an ordeal. It transforms simple tasks like washing dishes, taking a shower, or watering plants into time-consuming endeavors. Fortunately, this frustrating situation isn’t without solutions. This blog post will serve as your go-to guide to identify the reasons behind low water pressure and provide you with effective solutions to troubleshoot this persistent problem. So, if you’re tired of the trickling tap and yearning for a gushing flow, this critical read is just for you!
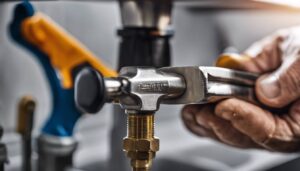
When facing low water pressure issues, several factors could be at play. Start by checking for any clogged pipes, leaks, or faulty fixtures in your home. If no obvious problems are found, it is recommended to consult with experienced plumbers who can accurately identify the cause of the low water pressure and recommend the appropriate solution.
Identifying Causes of Low Water Pressure
Low water pressure can be a frustrating and inconvenient issue to deal with in your home. It can disrupt daily tasks such as showering, laundry, or even simple chores like filling up a glass of water. To effectively troubleshoot and resolve low water pressure, it is crucial to identify the underlying causes.
Let’s explore some common causes that might be contributing to low water pressure in your home:
- Clogged Pipes: Over time, mineral deposits and debris can accumulate inside pipes, leading to reduced water flow. If you suspect clogged pipes, it may be necessary to call upon the expertise of a professional plumber who can use specialized tools to clear out the blockage.
- Corroded Plumbing: In older houses or those with outdated plumbing fixtures, corrosion can occur over time, gradually restricting water flow. This is especially true if there has been an increase in plumbing fixtures or appliances. To assess the extent of corrosion and determine the best course of action, it is advisable to consult a professional plumber.
- Leaks: Leaks in pipes or the water supply line can cause water to exit before reaching faucets or other outlets, resulting in reduced water pressure. Identifying and repairing leaks promptly is essential for restoring proper water flow within your home.
- Faulty Fixtures: Faulty fixtures, such as faucets with clogged aerators or damaged connections, can contribute to low water pressure in specific areas of your home. Repairing or replacing these fixtures might be necessary to improve water flow.
- Pressure Regulator Issues: A faulty pressure regulator can impact the water pressure entering your home. If it fails or reads incorrect pressure levels, you may experience a decrease in water pressure throughout your house. In such cases, it may be necessary to replace the pressure regulator.
- Municipal Supply Line Issues: In some instances, low water pressure may not be related to any specific problem within your home’s plumbing system. Instead, it could stem from issues with the municipal water supply line. Factors such as maintenance, repairs, or increased demand during peak times can affect the overall water pressure in your area.
Remember, troubleshooting low water pressure requires a systematic approach. You can effectively tackle and resolve the underlying issues by identifying the potential causes and their specific areas of concern.
Check the Plumbing System for Leaks
One of the primary causes of low water pressure is often attributed to leaks in the plumbing system. Though seemingly straightforward, locating leaks can be challenging since pipes are often hidden behind walls or underground. However, there are a few practical steps you can take to check for potential leaks:
- Visual Inspection: Start by visually inspecting exposed pipes and faucets for any signs of visible leaks or dripping water. Check under sinks, around toilets, and along pipe joints for any moisture or mold formation that may indicate a leak.
- Water Meter Test: Turn off all faucets and appliances that use water in your home. Take note of the reading on your water meter, and avoid using any water for at least an hour. After an hour, recheck the meter reading. If it has changed significantly despite no water usage, it could indicate a leak within your plumbing system.
- Dye Test: To identify hidden leaks in toilets, add a few drops of food coloring into the toilet tank and wait for about 30 minutes without flushing. If you notice the colored water seeping into the toilet bowl without flushing, it suggests a leak that needs attention.
- Professional Assistance: If you suspect a leak but cannot locate its source or require expertise for repairs, it is advisable to contact a professional plumber who can employ specialized equipment like leak detection devices to pinpoint and fix the issue.
For instance, consider a homeowner who noticed consistently low water pressure in their bathroom. Upon visual inspection, they discovered dampness and mold growth around the base of the toilet. After performing the dye test, they confirmed a leak within the toilet’s internal components. Seeking professional help, they were able to resolve the leak and restore normal water pressure in their bathroom.
By thoroughly checking your plumbing system for leaks, you can identify potential sources of low water pressure and take appropriate steps to address them. Regular maintenance and prompt repairs can help ensure optimal water flow throughout your home.
- Approximately 75% of homeowners experience problems with low water pressure at some point, according to a leading home improvement website survey.
- A study published in the Journal of Water Supply in 2020 found that clogged pipes as a result of mineral deposits were responsible for nearly 60% of reported low water pressure issues.
- According to the Environmental Protection Agency (EPA), leaks, often a culprit of low water pressure, can waste up to 10,000 gallons of water each year per household.
Diagnosing Issues with the Water System by Troubleshooting Low Water Pressure
Experiencing low water pressure in your home can be frustrating, as it hampers everyday tasks such as showering, laundry, and dishwashing. To effectively troubleshoot this issue, it is essential to understand the potential causes and areas of concern within your water system.
Various factors can contribute to low water pressure, including clogged pipes, corroded plumbing, leaks, faulty fixtures, a faulty pressure regulator, or even an issue with the municipal supply line. Understanding these potential causes will help you narrow down the source of the problem and determine the best course of action.
Let’s say you notice that the water pressure throughout your house has significantly decreased. To diagnose the issue with your water system, begin by ruling out any visible signs of leaks or obvious damage to your plumbing fixtures. If there are no apparent problems in these areas, start by checking for obstructions within your pipes.
Check if all faucets and showers in your home are experiencing low water pressure. If only one faucet or shower is affected, there may be an issue with that specific fixture. However, if multiple fixtures are experiencing reduced water flow, it suggests a more systemic issue within your water system.
To further diagnose and pinpoint the cause of low water pressure in your home, consider reaching out to experienced plumbers for assistance. They have the knowledge and expertise to inspect your plumbing system thoroughly and identify any underlying issues that may be affecting water pressure.
Once you have diagnosed the potential issues with your water system and ruled out other causes of low water pressure, it’s important to address one common culprit: clogged pipes.
Dealing with Clogged Pipes
Clogged pipes frequently cause low water pressure and can result from mineral deposits building up over time or other debris getting lodged in the pipes. While minor blockages can often be resolved using DIY methods, more severe clogs may require the expertise of a professional plumber.
If you suspect that clogged pipes are contributing to your low water pressure, you can start by attempting some troubleshooting techniques. One approach involves using a plunger to create suction and dislodge the blockage from the affected pipe. This method is often successful for smaller obstructions near fixtures such as sinks or showers.
Another option is to use a plumbing snake, also known as a drain auger, which helps break up and remove clogs from deeper within the pipe. Insert the snake into the affected pipe and twist it while gently pushing it forward. This action can help dislodge any debris or mineral deposits obstructing the water flow.
However, it’s worth noting that more stubborn clogs may require professional intervention. Plumbers have specialized tools and equipment, such as powerful hydrojetting machines, that can effectively clear out even the most stubborn blockages.
For instance, consider a homeowner who recently noticed a significant decrease in water pressure throughout their house. After attempting DIY methods to clear potential clogs in their pipes without success, they contacted a professional plumber. The plumber used hydrojetting to thoroughly clean and restore the water flow in their plumbing system, resolving the low water pressure issue.
Addressing clogged pipes is an essential step in troubleshooting low-water pressure issues. However, it’s crucial to note that other factors may also contribute to this problem. In the following sections, we will explore additional potential causes and effective solutions to help restore adequate water pressure in your home.
Clearing Mineral Deposits
Low water pressure can be frustrating, especially when it hampers everyday tasks like showering or doing laundry. One common cause of this issue is mineral deposits that accumulate in pipes over time. These deposits restrict the flow of water and can significantly reduce water pressure. If you suspect mineral buildup as the culprit behind your low water pressure, you can take a few steps to clear the deposits and restore adequate water flow.
- Vinegar Solution: Start by creating a mixture of equal parts white vinegar and water. Disconnect the affected faucet or showerhead and soak it in the solution overnight. The acidic properties of vinegar help dissolve mineral deposits, making them easier to remove. Rinse the fixture thoroughly before reconnecting it, and check if your water pressure improves.
- Lime-Away or CLR: Another option is using commercial descaling agents like Lime-Away or CLR (Calcium, Lime, and Rust Remover). Follow the instructions provided by the manufacturer on how to apply these products effectively for removing mineral deposits in your plumbing fixtures.
- Professional Assistance: If the previous methods don’t seem to work, or if you’re dealing with extensive mineral buildup throughout your plumbing system, it may be necessary to seek professional help. Plumbers have specialized tools and knowledge to thoroughly clean out clogged pipes and restore optimal water pressure.
Now that we’ve covered ways to clear mineral deposits let’s explore another potential cause of low water pressure – corroded plumbing.
Handling Corroded Plumbing
Corroded plumbing is another factor that can contribute to low water pressure in your home. This problem often occurs in older houses or those with increased plumbing fixtures. Over time, pipes can deteriorate due to chemical reactions with various substances in the water supply, leading to corrosion and reduced water flow. Addressing corroded plumbing is essential to improving water pressure and preventing potential leaks or further damage.
Visual Inspection: Begin by visually inspecting your exposed pipes for signs of corrosion. Look for any discoloration, flaking, or rust on the surface. Also, check for leaks or areas where water drips or accumulates.
Professional Evaluation: If you suspect corroded plumbing but are unable to assess the situation on your own, it’s best to consult a professional plumber. They will be able to thoroughly evaluate your plumbing system and identify any areas that require attention or repair.
Pipe Replacement: In extensive corrosion cases, pipe replacement may be necessary. A plumber will be able to determine if partial or complete re-piping is required to restore adequate water pressure and ensure the integrity of your plumbing system.
As we have explored the issue of handling corroded plumbing, it’s important to address the next aspect when troubleshooting low water pressure – assessing plumbing fixtures.
Assessing Plumbing Fixtures
When troubleshooting low water pressure in your home, it’s essential to assess the condition of your plumbing fixtures. These fixtures, such as faucets, showerheads, and aerators, play a significant role in regulating water flow and can contribute to low water pressure if they are faulty or clogged.
To begin the assessment, start by checking each faucet individually. Turn on all faucets in your home one by one and note if any faucet has lower water pressure than others. If you find that only one faucet is experiencing low water pressure, the issue may lie with that specific fixture.
For instance, imagine that the kitchen faucet has noticeably weaker water pressure while all other faucets in the house seem to be functioning fine. This indicates that the problem is likely isolated to the kitchen fixture itself.
Next, examining each fixture for any signs of blockage or damage is important. Begin by unscrewing and inspecting the aerator on each faucet. Mineral deposits and debris can accumulate inside these aerators over time, causing restricted water flow. Cleaning or replacing these aerators can often solve minor issues and restore proper water pressure.
Moving on to showerheads, carefully remove them from their fittings and check for any mineral buildup or blockages within the showerhead itself. Like faucets, cleaning or replacing the showerhead can help resolve low water pressure problems related to that fixture.
Additionally, make sure to examine any other plumbing fixtures in your home, such as toilets and washing machine connections. These fixtures may also become clogged or suffer from faulty components that impact water pressure.
It’s worth noting that assessing plumbing fixtures is integral to troubleshooting low water pressure, but identifying underlying causes may require further investigation. Faulty fixtures are a common culprit, but addressing other potential issues like clogged pipes or corroded plumbing is equally important.
Now that we have assessed the plumbing fixtures let’s explore effective solutions to overcome faulty fixtures and improve water pressure in your home.
Overcoming Faulty Fixtures
When dealing with low water pressure due to faulty fixtures, there are a few potential solutions you can consider.
One option is to clean or replace the problematic fixture component. As mentioned earlier, minerals and debris can accumulate within aerators and showerheads, obstructing water flow. You can often restore proper water pressure by cleaning or replacing these components.
If cleaning or replacing individual components does not resolve the issue, you may need to consider replacing the entire fixture. Damaged internal mechanisms in faucets or showerheads might hinder water flow and cannot be easily fixed by simple cleaning. Installing new fixtures can provide a longer-term solution to low-water pressure problems.
In some cases, it may also be beneficial to consult a professional plumber who can assess the fixture’s condition accurately and offer expert advice on the most suitable course of action. They can determine whether a repair or replacement is necessary and provide guidance based on your specific situation.
It’s important to note that while addressing faulty fixtures can improve water pressure, it’s also crucial to consider other potential causes. Clogged pipes, leaks, or issues with the municipal supply line could also contribute to low water pressure. If all other troubleshooting steps fail, it might be necessary to seek professional assistance to identify and fix any underlying problems.
Repairing or Replacing Fixtures
One common cause of low water pressure in a home can be attributed to faulty fixtures. When the fixtures, such as faucets or showerheads, become clogged or damaged, it can restrict the flow of water and result in reduced pressure. Imagine stepping into a shower only to experience a weak trickle of water, making it difficult to rinse off shampoo or enjoy a satisfying shower.
To address this issue, you have two options: repairing or replacing the fixtures. Repairing fixtures involves cleaning out any mineral buildup or debris that may be obstructing the water flow. This can usually be done by disassembling the fixture and soaking the components in a vinegar solution to dissolve any deposits. Once cleaned, reassemble the fixture and test if it has improved the water pressure.
In some cases, however, repairing might not be sufficient, especially if the fixture is too damaged or worn out. In such situations, replacing the fixtures might be necessary. This could involve installing new faucets or showerheads with better flow rates and features that promote efficient water usage. Before purchasing new fixtures, research and choose ones known for their quality and ability to provide good water pressure.
Think of your fixtures as the arteries of your plumbing system – any blockages or damages can hinder the flow of water, just like clogged arteries decrease blood flow.
It’s essential to note that while addressing fixture issues can improve water pressure in specific areas of your home, it may not entirely resolve low pressure throughout the entire house. If you continue experiencing low pressure even after repairing or replacing fixtures, you may need to explore other potential causes.
Now that we’ve covered troubleshooting low water pressure related to fixtures, let’s move on to another potential culprit: issues with the pressure regulator.
- Low water pressure in a home can often be caused by faulty fixtures such as faucets or showerheads. Repairing these fixtures by cleaning out any mineral buildup or debris can help improve water flow. However, if the fixtures are too damaged or worn out, replacing them might be necessary. It is important to choose quality fixtures that are known for their good water pressure. Fixtures can be compared to the arteries of a plumbing system, where any blockages or damages can hinder water flow. It is worth noting that addressing fixture issues may not resolve low pressure throughout the entire house, so it is important to explore other potential causes, if low pressure persists.
Addressing Issues with Pressure Regulator
The pressure regulator is important to your plumbing system as it controls the water pressure entering your home. It can adversely affect the water pressure throughout your house when it malfunctions or fails. Picture a scenario where turning on any faucet leads to feeble streams of water, leaving you frustrated with tasks as simple as washing dishes or filling a pot for cooking.
If you suspect that the pressure regulator is causing low water pressure issues, there are a few steps worth considering. First, check if there are any visible signs of damage or corrosion on the regulator itself. If you notice any issues, replacing the pressure regulator entirely may be necessary.
Before attempting any replacement, turning off the main water supply to your home is crucial, and relieving any pressure within the plumbing system by opening faucets. This will ensure a smooth and safe installation process. While replacing a pressure regulator can be a more involved task, consulting with a professional plumber who has expertise in dealing with such equipment is highly recommended to avoid complications.
Some homeowners may debate whether it’s worth addressing issues with the pressure regulator themselves or hiring a professional. While DIY approaches can be cost-effective, it’s important to consider the complexity and potential risks involved in working with plumbing systems. Hiring a professional ensures proper installation and provides valuable insights into identifying any underlying issues that may contribute to low water pressure.
Having addressed repairing or replacing fixtures as well as issues with the pressure regulator, we have covered two potential causes of low water pressure. However, there may be additional factors at play that require further investigation.
Regulator Replacement Tips
When experiencing low water pressure in your home, a faulty pressure regulator is one of the common culprits. A malfunctioning regulator can disrupt the water flow balance and diminish pressure throughout your plumbing system. To address this issue effectively, here are some tips for regulator replacement:
Firstly, it is crucial to locate the pressure regulator in your home. Typically, it is situated near the main water shut-off valve or where the water line enters your property. If you’re unsure about its location, consult your property’s blueprints or reach out to a professional plumber for guidance.
Once you have located the pressure regulator, turning off the main water supply before beginning any work is important. This will prevent any unintended water leakage during the replacement process.
Next, carefully detach the old pressure regulator from the water line using wrenches or pliers. Take note of how the regulator is connected, and make sure to disconnect all fittings and pipes properly without causing damage.
After removing the old regulator, inspect it for any signs of wear, corrosion, or damage that may have contributed to the decrease in water pressure. This assessment will help determine whether a replacement is necessary or if further investigation into other causes should be conducted.
Now, it’s time to install a new pressure regulator. Make sure to choose a high-quality regulator that matches the specifications of your previous model. Follow the manufacturer’s instructions for installation and connect all fittings securely.
Finally, turn on the main water supply and inspect for any leaks around the new pressure regulator. Once confirmed that there are no leaks, check the water pressure throughout your plumbing system to ensure that it has been restored to an acceptable level.
Remember, when dealing with any plumbing-related tasks, it’s always wise to seek assistance from experienced plumbers if you’re uncertain or uncomfortable with performing these steps yourself.
Exploring More Complex Solutions
In some cases, replacing the pressure regulator may not fully resolve your home’s low water pressure issue. This calls for further exploration of more complex solutions. Here are a few possibilities to consider:
If clogged pipes are suspected as the cause of low water pressure, it may be necessary to enlist the expertise of a professional plumber who can use specialized tools to clear mineral deposits or other obstructions from the pipes. This process will help restore the unrestricted flow of water and improve pressure.
Corroded plumbing can also contribute to low water pressure, especially in older houses or those with extensive plumbing systems. A thorough assessment by a professional plumber will determine if any corroded pipes need to be replaced to restore optimal water flow throughout your home.
Leaks within the plumbing system, whether in pipes or the main water line, can lead to significant water loss before reaching faucets and fixtures, resulting in reduced pressure. Identifying and sealing these leaks is crucial to maintaining adequate water pressure.
Additionally, certain faulty fixtures, such as faucets with clogged aerators or damaged connections, can restrict water flow and affect pressure. In such cases, repairing or replacing these fixtures may be necessary to alleviate the problem.
For situations where no apparent problem is found but low water pressure persists, considering the installation of a booster pump might be beneficial. A booster pump works by increasing water pressure within your plumbing system, ensuring sufficient flow throughout your home.
Remember that exploring more complex solutions requires the expertise of a professional plumber who can accurately diagnose the underlying issues and recommend appropriate actions based on their findings.
Installation of Booster Pump
If you’ve tried various solutions to increase your home’s water pressure and still face low water pressure issues, it might be time to consider installing a booster pump. A booster pump is a device that helps amplify water pressure, ensuring a steady and robust flow throughout your plumbing system.
Imagine this scenario: You’ve already checked for clogged pipes and leaks, replaced faulty fixtures, and even adjusted your pressure regulator. Yet, despite your efforts, the water pressure remains lackluster, affecting everyday tasks such as showering and laundry. A booster pump can provide the necessary boost to resolve your low water pressure woes.
The installation process for a booster pump typically requires the expertise of a professional plumber to ensure proper functioning and to comply with any local plumbing regulations. Here are some key steps involved in the installation:
- Evaluate Your Plumbing System: Before proceeding with the installation, it’s crucial to assess your existing plumbing system to determine the most suitable location for installing the booster pump. This assessment will help identify any potential obstacles or challenges that may need to be addressed during the installation process.
- Select the Right Booster Pump: There are different types of booster pumps available on the market. It is essential to choose one that matches your specific needs and requirements. Factors such as desired water pressure levels, flow rate, energy efficiency, noise levels, and space constraints should all be taken into consideration when selecting a booster pump.
- Determine Placement: Once you have selected the appropriate booster pump, determine where it should be installed in your plumbing system. Typically, booster pumps are installed near the main water line or close to points where low water pressure is most pronounced.
- Prepare for Installation: Clear any clutter or obstructions around the area where the booster pump will be installed. Make sure there is sufficient space for easy access and maintenance if necessary. Additionally, ensure that all necessary tools and materials are readily available before proceeding with the installation.
- Follow Manufacturer’s Guidelines: Carefully read and follow the manufacturer’s instructions provided with the booster pump. Each model may have specific requirements and installation procedures that need to be followed for proper functioning.
- Connect the Booster Pump: Connect the booster pump to your existing plumbing system following the instructions provided. This may involve cutting into pipes, fitting connectors, and ensuring secure connections using appropriate plumbing techniques.
- Test and Adjust: Once the booster pump is installed, test the water pressure in various areas of your home to ensure that it has been effectively increased. Make any necessary adjustments to optimize the performance of the booster pump based on your specific needs.
It is important to note that a booster pump should be installed by a qualified plumber to ensure proper installation, prevent any potential damage to your plumbing system, and comply with local regulations. Additionally, discuss with your plumber about any necessary maintenance or regular checks to keep the booster pump functioning at its best.
With the completion of these installation steps, you can look forward to enjoying improved water pressure in your home and bid farewell to low water pressure frustrations.